Hi everyone!! Hope your have a super day. Here in Northern California, we have had some sunny days yesterday and today. Wahoo!! My poor children were so ready to play outside, (Me Too). Tomorrow I will have a fun project to post. Have a Super Creative Day!!
Blessings,
Carol

Wednesday, March 30, 2011


Sunday, March 27, 2011
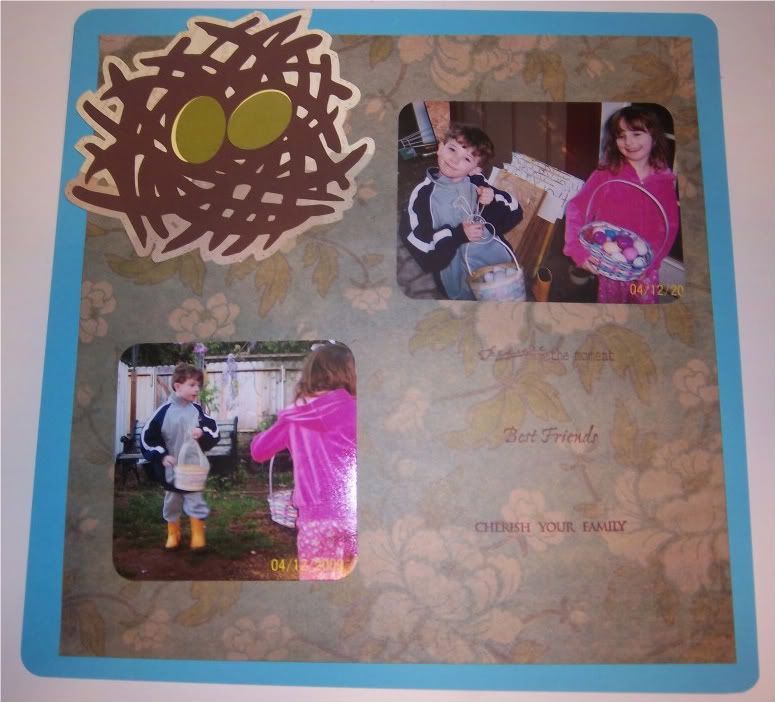
Easter Egg 12 X 12 Page
Good Sunday to you all! Here in Northern California we actually have partially clear skies. Yeah!! There has been so much rain the last week, I thought we were going to have to build an ark like Noah did. So, today I though I would post a cute and very simple page for Easter. The cartridge is the Cricut From the Nest. Have fun with it.!!
Supplies Needed;
Cricut Cutting Machine
Cricut Cartridge; From The Nest
Solid and Printed Cardstock
Sayings Stamps
Black Marker
Instructions;
Cut 1- 5 in Nest (Layer, Shadow Shift), 1- 5 in Nest, 1- 5 in Nest (Shift)
Start with a solid piece of 12 X 12 cardstock, then with the printed cardstock, cut 1 in off 2 sides. Use a decorative corner rounder on the corners. I have one from Creating Memories (had it for years).
After all pieces are cut out just assemble them and place on the scrapbooking page. Using any type of saying stamps, stamp on the printed page. Add accents to to the eggs and nest.
There you have a nice Springy Easter page.
Remember think outside of the box.

Supplies Needed;
Cricut Cutting Machine
Cricut Cartridge; From The Nest
Solid and Printed Cardstock
Sayings Stamps
Black Marker
Instructions;
Cut 1- 5 in Nest (Layer, Shadow Shift), 1- 5 in Nest, 1- 5 in Nest (Shift)
Start with a solid piece of 12 X 12 cardstock, then with the printed cardstock, cut 1 in off 2 sides. Use a decorative corner rounder on the corners. I have one from Creating Memories (had it for years).
After all pieces are cut out just assemble them and place on the scrapbooking page. Using any type of saying stamps, stamp on the printed page. Add accents to to the eggs and nest.
There you have a nice Springy Easter page.
Remember think outside of the box.
Blessings,
Carol
Friday, March 25, 2011
Easter Goodie Bag Video
I just downloaded this onto youtube. Still need to work out some things with video taping. For some reason the microphone makes me have a lisp. Videos will be tweaked as I continue. Also I have a link to my youtube channel. On my youtube tab on my blog also contains a link to my channel. Thanks everyone. Appreciate each of you who follow my blog.
http://www.youtube.com/user/3KidCropShop
Blessings,
Carol
http://www.youtube.com/user/3KidCropShop
Blessings,
Carol
Wednesday, March 23, 2011
Look for my Video in a few days.
Hi everyone, I just wanted to let you know that I am working on a video for my blog. This one is fun and I have already posted the project. Just keep your eyes open and it will be posted. Thanks again to all who are following my blog, you are all appreciated.
Blessings,
Carol
Blessings,
Carol
Sunday, March 20, 2011
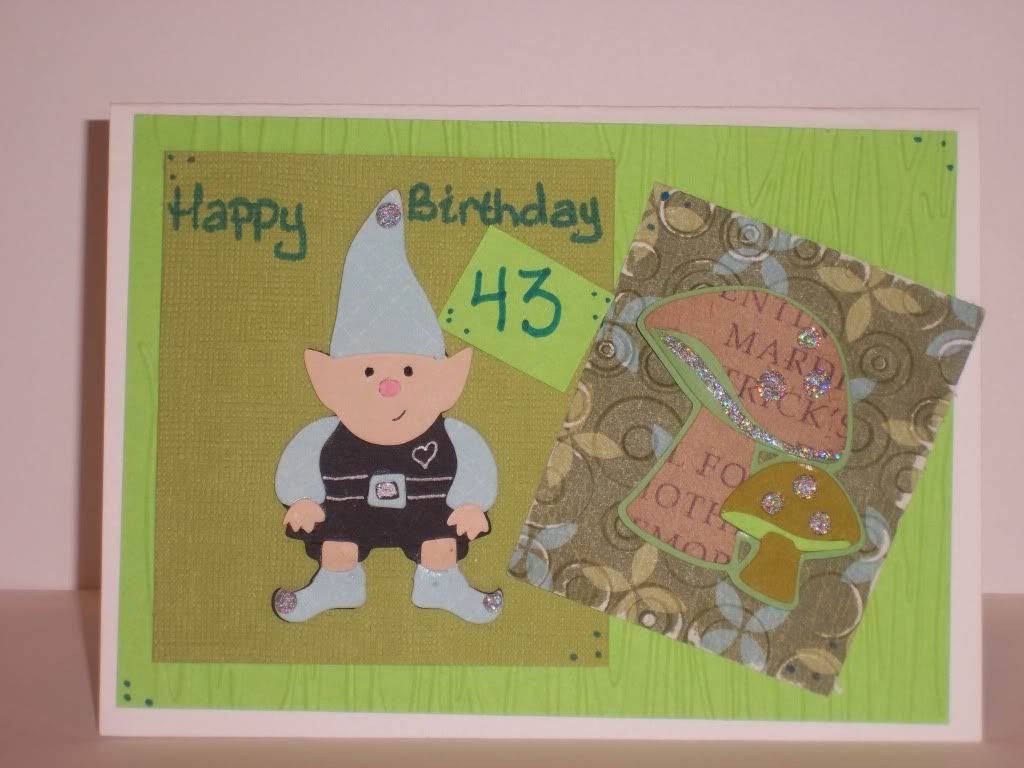
Have a Very Gnomie Birthday Card Using Cricut Cartridge; "Freshly Picked"
The other day I decided that it was about time to use the Gnome image in the Freshly Picked Cricut Cartridge. This card is for my husbands birthday in a few weeks. Thought is would be fun since he is my little Gnome man. Enjoy this quirky little birthday card.
Supplies Needed;
Cricut Cutting Machine
Cricut Cartridge; Freshly Picked
Solid and Printed Cardstock
Glitter Glue
Embossing Machine or Sizzix Embossing Boutique
Sand Paper Square
Silver Gel Pen
Instructions;
Cut 1- 2 3/4 in Gnome 1 (shift), and (layers shift). Cut 1- 1 3/4 in Mushroom all the parts except the dots.
Make a mat for the card (mine is green), emboss it. Cut another mat that fits just right for the gnome. Cut a 3 X 3 in mat for the mushrooms from printed cardstock, emboss it then run the sand paper over it lightly.
Put the images together and add accents to the gnome and mushrooms. Use the silver gel pen on the gnome. Add accents on the rest of the card. Write Happy birthday on the tiny mat ( I did not measure that one). There you go, you now have a really cute card.

Supplies Needed;
Cricut Cutting Machine
Cricut Cartridge; Freshly Picked
Solid and Printed Cardstock
Glitter Glue
Embossing Machine or Sizzix Embossing Boutique
Sand Paper Square
Silver Gel Pen
Instructions;
Cut 1- 2 3/4 in Gnome 1 (shift), and (layers shift). Cut 1- 1 3/4 in Mushroom all the parts except the dots.
Make a mat for the card (mine is green), emboss it. Cut another mat that fits just right for the gnome. Cut a 3 X 3 in mat for the mushrooms from printed cardstock, emboss it then run the sand paper over it lightly.
Put the images together and add accents to the gnome and mushrooms. Use the silver gel pen on the gnome. Add accents on the rest of the card. Write Happy birthday on the tiny mat ( I did not measure that one). There you go, you now have a really cute card.
Blessings,
Carol
Thursday, March 17, 2011
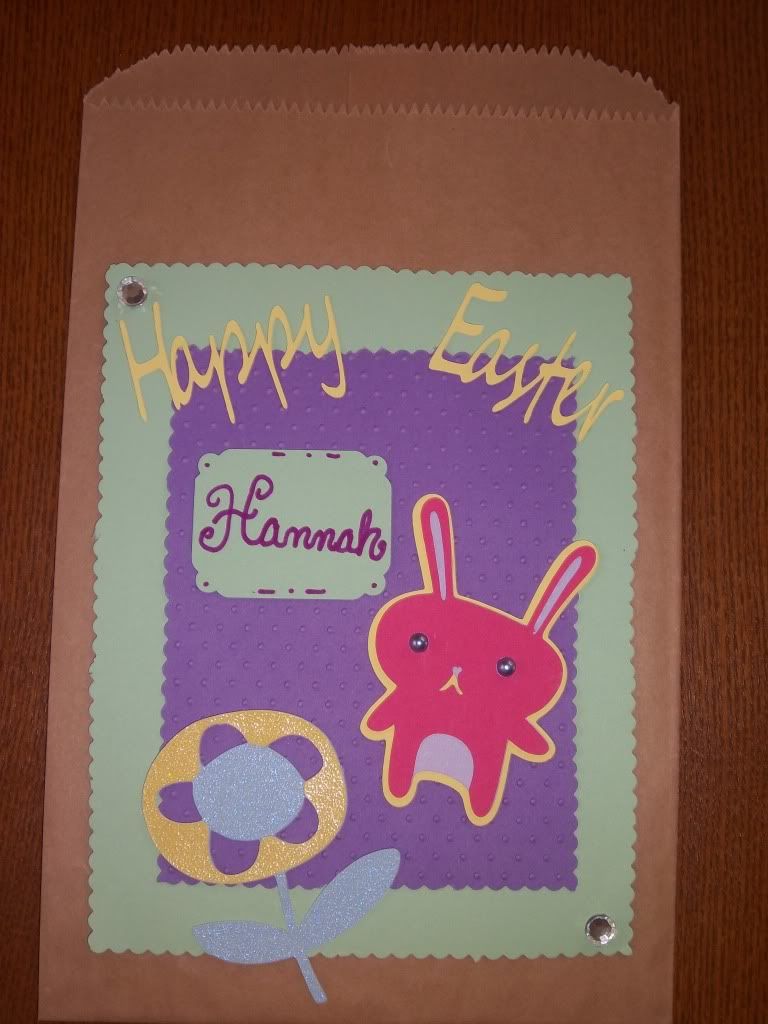
Easter Goodie Bag Made With The Cricut Cartridge "Give A Hoot"
Good afternoon everyone!! Hope you all are having a nice day. Here in Northern California, we actually have a bit of sunshine. This winter has been crazy. Our rainfall totals are over our normal. So needless to say, my little family feels a bit water logged.
Anyways, today I am posting a really cute Easter Goodie Bag using the Cricut Cartridge "Give A Hoot". This was fun and easy to make. This is part of mypinkstamper.com Blog Hop. The paper bag that I used are ones that I have had for about 5 years. When I purchased them it was cheaper to get 500 count than smaller amounts. This project is using what you have in your scrapbooking creative room!! My hope is that you all will enjoy this project.
Supplies Needed;
Cricut Cutting Machine
Cricut Cartridge; Give A Hoot
Solid and Sparklie Cardstock
Sparklie Gems & Pearls
Sure Cuts A Lot or Design Studio
Blade 6, Speed Low or Med, Pressure High
Instructions;
With your solid cardstock cut a 5.5 X 7 in mat and a 4.5 X 6 in mat (emboss this one). With the embossed one use decorative scissors to cut the part that did not get embossed. Cut 2 X 1.5 in mat for writing the name.
Cut 1- 3 in Rabbit 1 and (shift), and (shadow). Cut 1- 3 in Rabbit 1 (accent) and (accent shift) for the flower. Make sure to use the multi cut on the flower pieces. The sparklie paper need the extra cut.
I used my Sure Cuts A Lot program for the words "Happy Easter".
Start putting large mat then the smaller embossed mat on the paper bag. Assemble the images glue to the mats as shown in the photo. Add the sparklie gems and pearls. Write name.
If you don't happen to have or find paper bags like this just used the ones for lunches. I have some on those lunch bags from Sams Club near my home.
I loved this creation. My children are going to be sooo excited to get this filled with candy in their Easter Basket this year.

Anyways, today I am posting a really cute Easter Goodie Bag using the Cricut Cartridge "Give A Hoot". This was fun and easy to make. This is part of mypinkstamper.com Blog Hop. The paper bag that I used are ones that I have had for about 5 years. When I purchased them it was cheaper to get 500 count than smaller amounts. This project is using what you have in your scrapbooking creative room!! My hope is that you all will enjoy this project.
Supplies Needed;
Cricut Cutting Machine
Cricut Cartridge; Give A Hoot
Solid and Sparklie Cardstock
Sparklie Gems & Pearls
Sure Cuts A Lot or Design Studio
Blade 6, Speed Low or Med, Pressure High
Instructions;
With your solid cardstock cut a 5.5 X 7 in mat and a 4.5 X 6 in mat (emboss this one). With the embossed one use decorative scissors to cut the part that did not get embossed. Cut 2 X 1.5 in mat for writing the name.
Cut 1- 3 in Rabbit 1 and (shift), and (shadow). Cut 1- 3 in Rabbit 1 (accent) and (accent shift) for the flower. Make sure to use the multi cut on the flower pieces. The sparklie paper need the extra cut.
I used my Sure Cuts A Lot program for the words "Happy Easter".
Start putting large mat then the smaller embossed mat on the paper bag. Assemble the images glue to the mats as shown in the photo. Add the sparklie gems and pearls. Write name.
If you don't happen to have or find paper bags like this just used the ones for lunches. I have some on those lunch bags from Sams Club near my home.
I loved this creation. My children are going to be sooo excited to get this filled with candy in their Easter Basket this year.
Blessings,
Carol
Wednesday, March 16, 2011
A Huge Thank You To Sheri At My Sheri Crafts Blog
Sheri gave this to me the other day (Ooo-La-La ) located under my received blogs, and I am so very blessed to receive it. I participated in one of her challenges. If you have not stopped by her blog you must. The challenges are fun. All the people who share the ideas are wonderful!! I am truly inspired by their creativity. Just click on this link http://myshericrafts.blogspot.com/ and it will take you over to Sheri's Blog. Have a Happy Creative Day!!
Blessings,
Carol
Blessings,
Carol
Subscribe to:
Posts (Atom)