Good morning everyone. Today in California it is about to rain. Our nice sunny weather is leaving us today. Oh well, bound to happen soon enough for it is November now.
We are so looking forward to next week being with our church family on this special day. We have not had the traditional meal in several years. Here is what we have had in the past 4 years we have had Thai, Mexican, BBQ, and this year roast pork with sauteed veggies,homemade sweet dinner rolls and fresh green salad, plus dessert. Looking forward to just spending the day with the people we love.
May your Thanksgiving be wonderful and blessed.
Blessings,
Carol
Friday, November 19, 2010
Wednesday, November 10, 2010
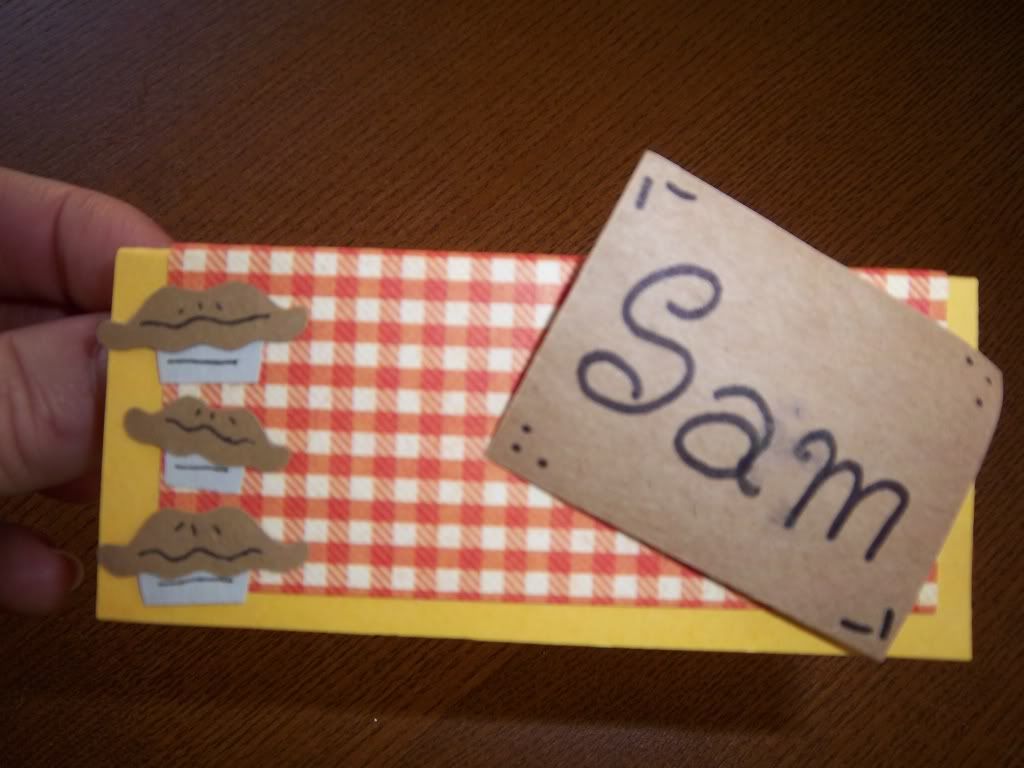
Thanks Giving Place Cards
Ok, these turned out really cute. I will be making 5 more for our Thanks Giving Feast which is coming up real soon. Super easy to make and you could use stamps for the image if you don't happen to have a Cricut machine. Think outside of the box as I always say. Lots of uses for the place cards too. You could use them as tags for gifts, labeling food at a buffet, and much more.
Items needed;
Cricut Machine
Plain and Printed Cardstock Paper
Black Pen
Craft Glue
Sticky Dots or Foam Squares
Cricut Cartridge (Speaking of Fall)
Instructions;
Cut out 1 - 2 inch E use the layer button, this makes the top of the pies.
Cut out 1- 2 inch E use the trifold card and shift button. Just cut off the unwanted pieces. This makes the bottom of the pie. I used a grayish colored paper so it would look like a pie tin.
Take your glue and glue the pieces of the pie together and then make the markings on the pie and tin with the black marker.
For the base of the place card you will need to cut a 3 1/2 X 4 inch square. I used my paper cutter, this made is super easy. For the printed piece, I just cut it a little smaller for the base would show around the edges. Just glue the printed square to the solid square. Let dry then fold in half.
To make the square for the name, cut out a 2 X 1 1/2 inch square and write name or even stamp name with letter stamps. Attach to place card with sticky dot or foam sqare.
Now glue the pies onto the place card.
In no time at all, you have super cute place cards that will brighten up any Thanks Giving table. Have fun with it!!
Blessings,
Carol
*This is an orginal creation.
Sunday, November 7, 2010
Tough Week
Well, if your a parent you know how things can change in an instant. Last week I did not get to post anything, for myself and my two children were sick. We had that sinus cold, which was not much fun at all.
I just wanted to let you all know that in a couple of days I will be posting the instructions for Thanks Giving place cards. Believe me these turned out really neat.
Come on back for that fun craft.
I just wanted to let you all know that in a couple of days I will be posting the instructions for Thanks Giving place cards. Believe me these turned out really neat.
Come on back for that fun craft.
Subscribe to:
Comments (Atom)


