
Ingredients;
Cricut Cartridge Simply Charmed
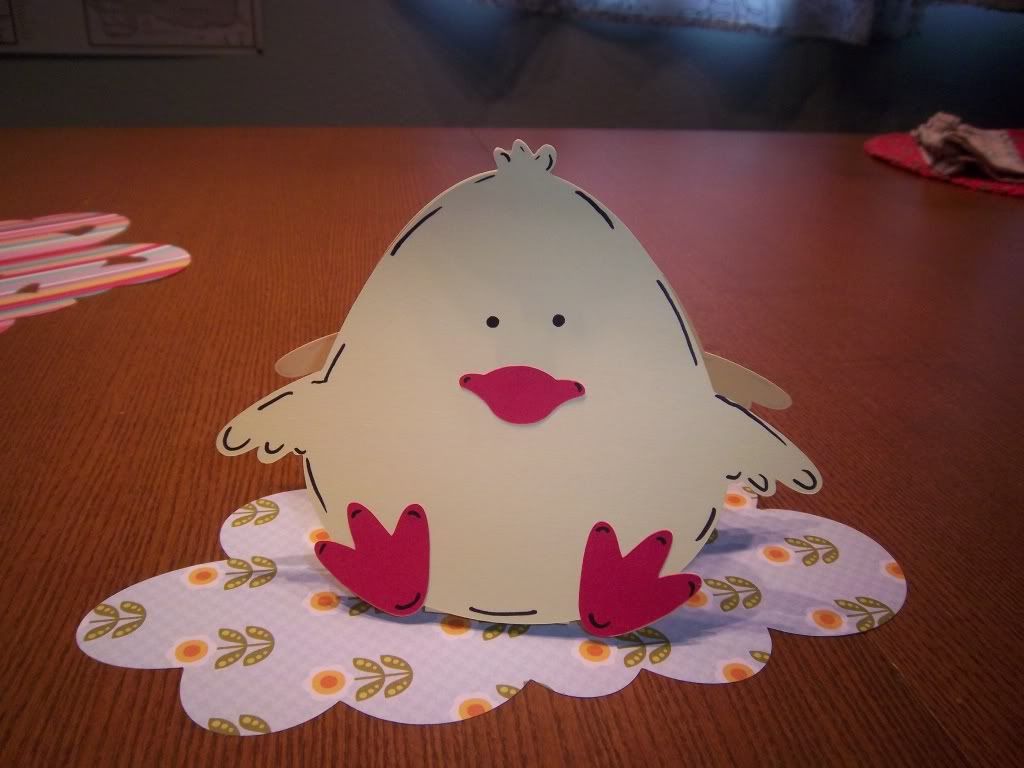
Cut 2 each of the following at 5 inches; Chick, Chick Layer 2.
Cut 1 - 9 inch Rainbow Layer 3
Cardstock
Black Pen
My ATG Pink Tape Gun
Instructions:
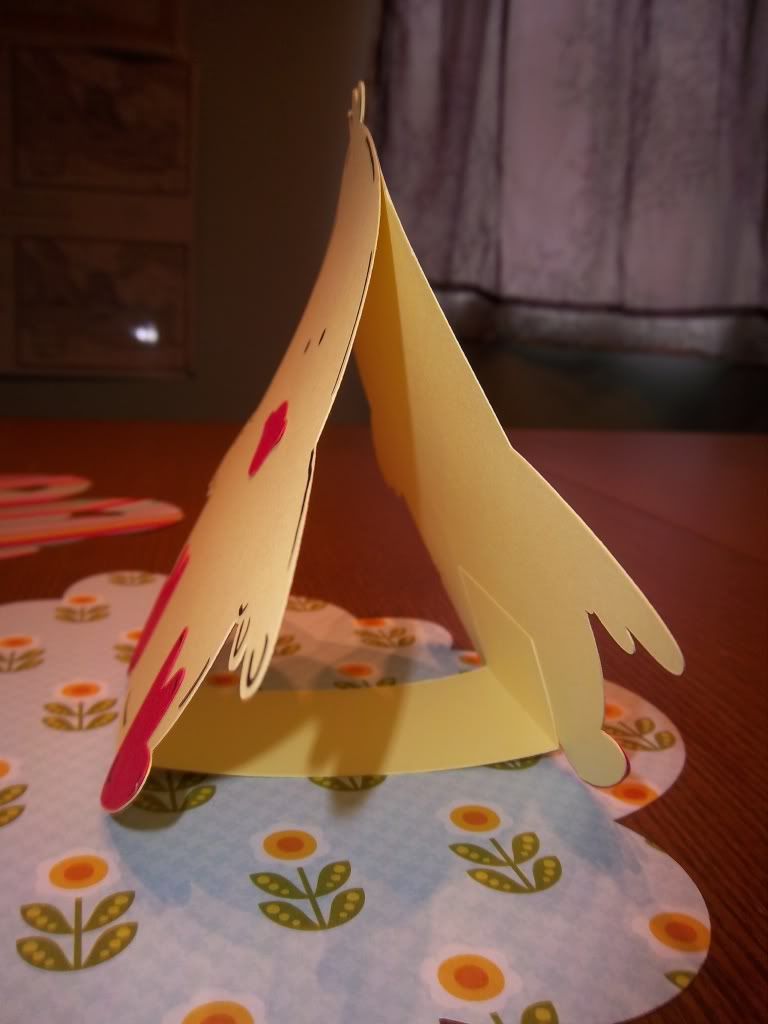
Make sure to cut all the parts of the Chick. Before putting all parts on the chick, you must make sure to line up the body back with the front. The back needs to be facing the same direction as the front. Now place all the parts on the chick.
Cut a strip of paper (cardstock) 1 1/2 in wide by 5 in long. Then use something to make a crease at the ends about 1 1/2 in from the edge. Attach one folded end to the front of the chick at the bottom inside. See the photos below. Glue the top of the head together.
Now cut the cloud from Rainbow Layer 3.
Set your cute little chick on the cloud. Lovely little center piece.
Happy Creative Day!!
Blessings,
Carol
Love, love love your littlee chicken card! I'm a newbie to your blog and a new follower!
ReplyDeletePinkE
SimplyPinkE.blogspot.com
So cute! Love your little chicken place holders
ReplyDeleteDear Carol, this is just beautiful. Love everything about it. All the elements work so well together. Hope you are having a fab week. I gentle invite you to visit my Blogspot Bettyscraftsandpaperdesign and Dream Crafty Online Shop "Hobby-crafts-and-paperdesign.de" It would be a glory for me, if you linked my Online Banner on your glamorous Blogspot. So it make it possible, all the creativ, friends worldwide, find my dream online shop too! Many Hugs from Marina
ReplyDelete